28 Nov Adding Trim to Kitchen Cabinets to Refresh Your Home
Adding trim to kitchen cabinets means attaching simple wood or molding pieces to your cabinet doors to create a clean, upgraded look without replacing the cabinets. It is one of the easiest ways to change the style of a kitchen on a small budget. This guide explains how the process works, what materials you may need, and how to get results that look neat and professional.
Now let us begin the full detailed article.
Why Updating Your Cabinets With Simple Trim Makes a Big Difference
Many people want to improve their kitchen but feel overwhelmed by the idea of a full remodel. Replacing cabinets takes a lot of time and money. A smarter option is updating what you already have. Trim is one of the most powerful tools for this. Small wood pieces can change plain doors into stylish custom looking panels.
Trim adds depth to flat surfaces. When light hits the trim, soft shadows appear. This gives your kitchen a more interesting look. Just a thin frame or molding piece can make cabinets look newer and more expensive. Many homeowners like this option because it works well in older kitchens that feel flat or outdated.
Another benefit is that trim goes well with many styles. It fits modern kitchens, classic kitchens, farmhouse kitchens, and simple family kitchens. You do not need fancy equipment or special skills. Anyone can learn how to add trim with a little patience. It lets you update your space in a clean and affordable way without changing the main structure of your kitchen.
How Trim Upgrades Can Transform Older Kitchen Cabinets
Older cabinets often lose their shine over time. Doors get scratched. Paint fades. The style looks plain. When you add trim, the cabinets get a new sense of shape. Even shallow trim pieces can turn a flat surface into something much more refined. This helps your kitchen look cleaner and fresher without replacing anything.
Trim also hides small dents and marks. Many older cabinets have small flaws that become obvious when light shines on them. Trim covers those flat areas and shifts attention to the beautiful frame you added. After a fresh coat of paint, the transformation becomes even more noticeable.
Homeowners are often shocked by how different their kitchen feels after adding trim. The doors feel solid. The lines feel clean. The entire space looks more cared for. Trim does not just change the cabinets. It changes the mood of the kitchen. A place that once felt outdated can feel modern and polished in only a few days.
Understanding the Basics Before Adding Trim to Kitchen Cabinets
Before you start your project, it helps to understand a few simple basics. Your trim needs to fit smoothly, so your first step is measuring your cabinet doors. Measure the length of each door side. Write down the numbers. Then decide how wide you want your trim pieces to be. Thin trim makes a light shaker design. Thicker trim makes a bold and classic look.
Your material matters too. Many people use pine because it is easy to cut. Others choose medium density fiberboard because it creates a smooth finish when painted. Both materials work well for beginners. You also need glue, a small amount of wood filler, a sander, and a brush or roller for paint.
Think about the final look you want. Some people want simple lines. Some want rich details. Your design choice will guide the placement of your trim pieces. Once you know the basics, the project becomes simple. The key is slow steady work and attention to small details. That is how you get a smooth professional finish.
Adding Trim to Cabinet Doors for a Fresh and Clean Look
Adding trim to cabinet doors is one of the easiest ways to refresh the look of your kitchen. The method is simple. You start by cutting trim pieces that match the edges of your cabinet door. Then you attach them with a thin amount of glue. Once the trim is set, the door takes on a framed appearance that feels custom.
This upgrade works well because trim gives the door more structure. It creates smooth straight lines that draw the eye. Even a plain kitchen begins to feel more like a designer space. The clean frame helps highlight the color of your cabinets and the hardware you choose.
Many homeowners use this method to create a shaker style look. Shaker doors are known for their simple rectangular frame. With trim, you can create this look without buying new doors. Once the doors are painted, you often cannot tell the difference between new shaker doors and old doors that were upgraded with trim. It is a simple trick that saves a lot of money.
What You Need to Know Before Adding Trim to Flat Cabinet Doors
Flat cabinet doors are ideal for trim work because they give you a smooth surface. Before you attach anything, make sure the door is clean. Old grease or dust can stop glue from holding. A quick cleaning makes your trim stick better.
Next, check if the surface is smooth. If you see bumps or scratches, lightly sand them. A smooth base helps the trim sit flush and even. This step makes your final paint look cleaner and more polished.
Choosing the right trim size is important. Thin trim adds soft detail. Wide trim adds bold style. Your choice depends on your kitchen size and the look you want. If your kitchen is small, thin trim keeps the space open. If your kitchen is large, you can use wider trim for more character.
Your cuts must be accurate. Even a small gap shows once the paint dries. Measure and cut slowly. Practice on a scrap piece if needed. Good trim work comes from careful cutting and smooth attachment.
How to Add Trim to Cabinet Doors Without Replacing Them
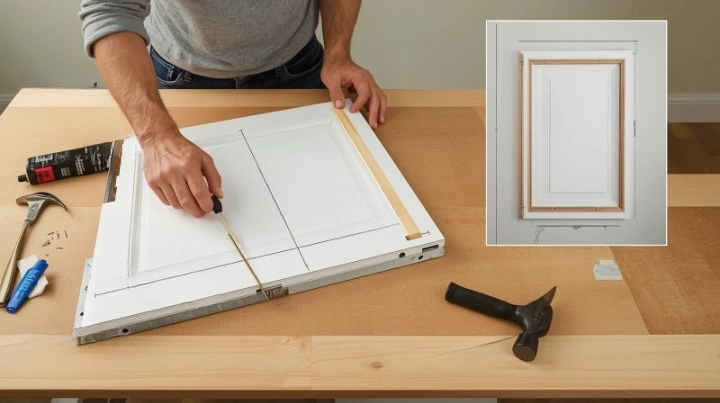
You do not need to remove your entire cabinet system to upgrade it. You only work on the doors. Most homeowners take the doors off the hinges so they can work on a flat surface. This makes the job easier and more controlled.
Start by laying your door on a table. Measure each side. Cut trim pieces that match those lengths. Place each piece around the edges to see how they fit. If something looks uneven, trim it carefully. Once the fit is perfect, add a thin line of wood glue to the back of the trim. Press it down gently. Some people add small nails for extra strength. You can use either method.
Once the trim is attached, fill the small nail holes if you used nails. Use a tiny bit of wood filler. Smooth it with your finger. Then sand lightly when it is dry. Your goal is to make the trim look like it was always part of the door.
Now paint the entire door. When the paint covers the trim and old surface, the cabinet looks freshly built. The new trim turns a plain door into a crisp new design. You get a beautiful finish without replacing anything.
Choosing the Right Molding Style for Kitchen Cabinet Trim
There are many molding styles and each one creates a different look. The right style depends on your cabinets, your kitchen size, and your overall design goals.
Square edge molding is simple and modern. It works well in homes that have a clean and minimal style. Rounded molding looks softer and more traditional. It brings a classic feeling to your cabinets. Decorative molding has more detail. It works best in classic or vintage kitchens.
Think about your cabinet color when choosing molding. Thin molding looks sharp on dark cabinets. Wide molding looks bold on light cabinets. You can also match molding with your crown molding or baseboards so your kitchen feels connected.
You also want molding that is easy to paint. Most wood molding accepts paint well. Medium density fiberboard also paints nicely. When your molding and trim match your kitchen style, your cabinets look new and well designed.
How to Add Molding to Kitchen Cabinets for a Custom Finish
Molding is another way to upgrade your cabinets beyond simple door trim. You can add molding to the top of your cabinets to create height. This gives your kitchen a more finished and built in look. Many homeowners add crown molding for a high quality appearance.
You can also place molding under cabinets or on the sides. These extra touches create a layered effect. They make your cabinets look like they were designed with care from the beginning. Molding works with trim because both elements create strong visual lines.
The process is similar to adding trim. You measure each section, cut the molding, attach it with glue, and secure it with small nails. Then you fill small gaps, sand lightly, and paint. When everything is painted the same color, the molding blends in and looks natural.
This step is what many people use to create a high end kitchen look without buying new custom cabinets. It is a smart way to upgrade without spending much.
Common Mistakes to Avoid When Adding Trim to Your Cabinets
Even simple trim projects can go wrong if you skip careful steps. Here are the most common mistakes and how to avoid them.
• Cutting trim without double checking measurements
Trim must fit perfectly. Even a small gap becomes visible after painting. Always measure twice and cut once.
• Using too much glue
Extra glue squeezes out and creates bumps that show through paint. Use a thin balanced line for a clean bond.
• Painting before the trim is fully dry
Wet glue affects paint and leaves streaks or uneven texture. Let everything dry completely before painting.
• Skipping sanding between coats
Light sanding makes the surface smooth. Without it, paint can look rough or chalky.
• Allowing trim to sit uneven or crooked
Even a tiny tilt is noticeable once the door is painted. Make sure each trim piece is straight and aligned before it dries.
• Rushing the project
Trim work needs slow steady steps. Taking your time gives a professional finish that looks custom and clean.
How CK’s Windows & Doors Helps Local Homeowners With Cabinet Trim Upgrades in Idaho Falls
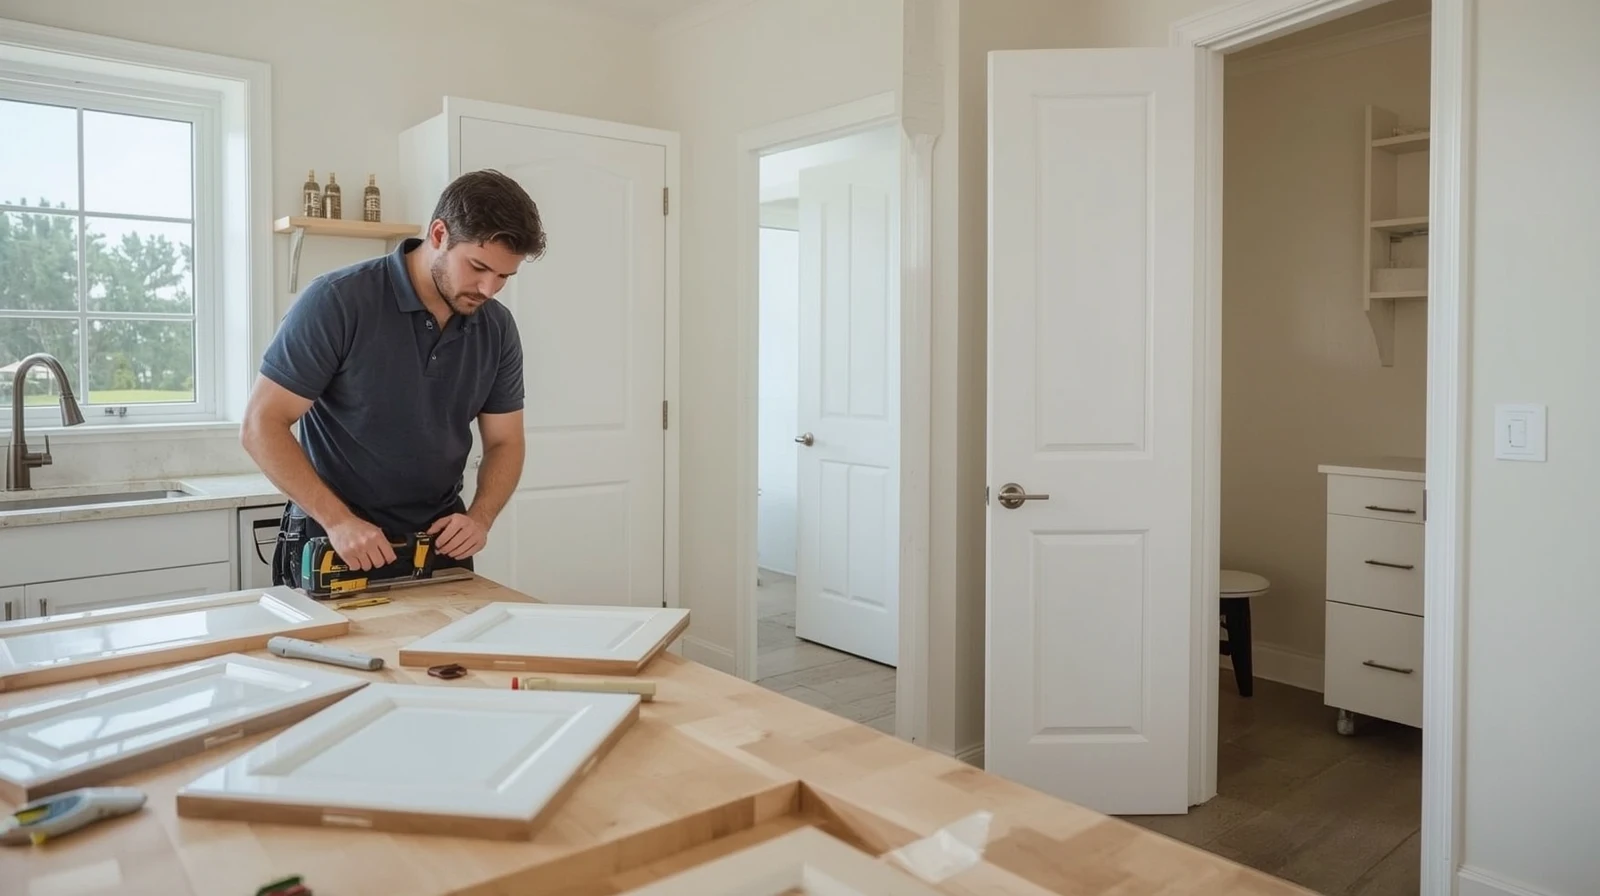
CK’s Windows and Doors has helped many homeowners update their kitchens with clean and crisp trim work. Their team understands the best materials to use and how to get a perfect finish. They guide you through trim choices so you get the right look for your kitchen.
Some homeowners want help with tricky cuts or detailed molding designs. The team at CK’s Windows and Doors uses tools and skills that make the job easy. They can complete the project quickly and deliver a smooth result that looks custom built. Their work helps homes feel modern and refreshed without the cost of replacing cabinets.
When to Call a Pro for Cabinet Trim Installation and What to Expect
Many homeowners can complete this project on their own. But sometimes it becomes smart to call a professional. If your cabinets are uneven, damaged, or shaped in a complex way, a pro can get better results. Professionals know how to measure perfectly and cut trim so the fit is tight and clean.
A pro will attach the trim, fill gaps, sand the doors, and paint everything until it looks smooth. You get a flawless finish that appears factory made. This saves you hours of work and ensures your kitchen looks beautiful from every view.
If you want your cabinets to look fresh without buying new ones, this is the perfect time to take action. Reach out today and get a clean custom trim finish that brings new life to your kitchen.